Most Bloggers will prefer this method to add Page navigation Menu , because this method is very easy than editing Blogger Template.
Let us see how to add this Page Navigation Menu Widget :

1 : Login to your Blogger account and Navigate to Layout Section . Now click Add Page Element link there.
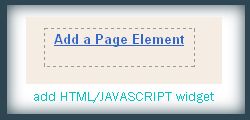
Step 2 : In that Page Element window , choose HTML / JAVASCRIPT .
Step 3 : Now add this Javascript in that window
Download the script code
.After Adding this Javascript you need to drag and drop the widget below the Blog Posts main widget. See this screen shot
In the code above you can edit the lines in red to your wish .
1 : var pageCount = 5;
The digit in red represents number of posts to be shown in single page. Change the digit to show as many pages you want.
for example :
In my blog I have put that value as 2 . In each page you can see only 2 posts .
2 : var displayPageNum = 3;
here the digit in red represents number of pages to be listed.
For example :
In my blog I have chosen 3 , then 3 pages will be shown.
Now save your template .
That's it now we have added Page Navigation menu widget to our blog successfully .
I hope you guys will feel this method is easier
Share this
 1 : Login to your Blogger account and Navigate to Layout Section . Now click Add Page Element link there.
Your comment are Welcome